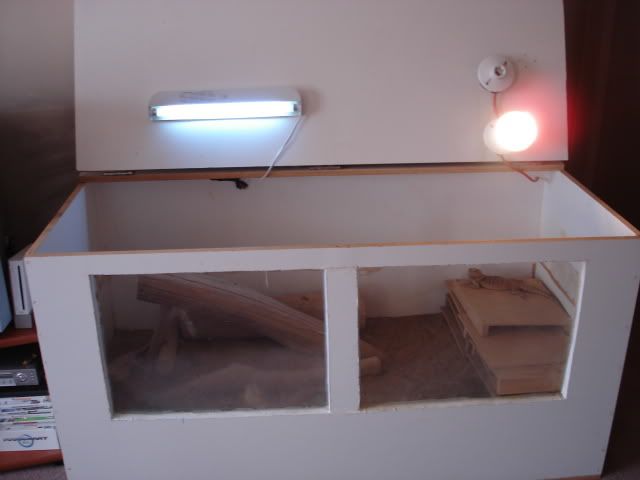
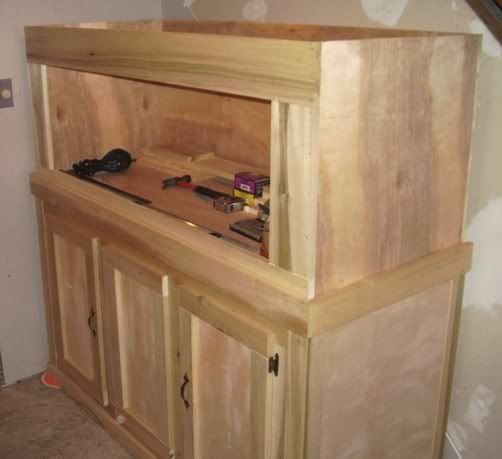
• Hello guest! Are you a Bearded Dragon enthusiast? If so we invite you to join our community and see what it has to offer. Our site is specifically designed for you and it's a great place for Beardie enthusiasts to meet online. Once you join you'll be able to post messages, upload pictures of your dragons and enclosures and have a great time with other Bearded Dragon enthusiasts. Sign up today!

1st beardie -- 1st diy cage(w/pics) -- looking for feedback

EAGLES

Bearded Dragon Egg
3 Year Member
Messages
98
staylor said:
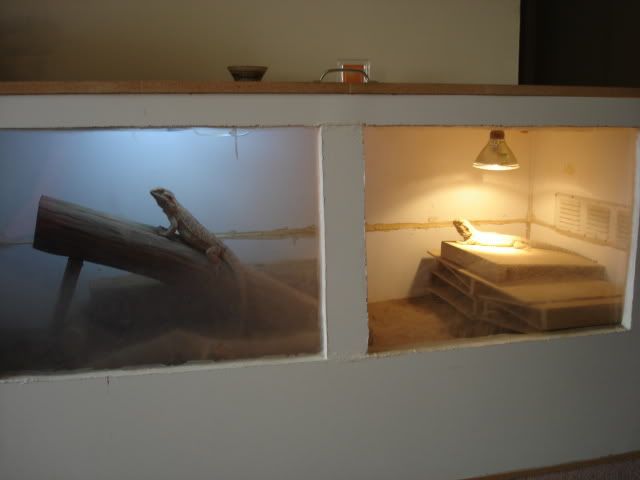
it is a plywood bottom for support, tile put over it and the sides are insulation carved like rocks, then covered in grout, then sealed with a sealant mixed with play sand for traction and appearance.

Ahh, I see...thank you.
Wish there was a step by step detailed, that would be cool.
 

EAGLES

Bearded Dragon Egg
3 Year Member
Messages
98
I ripped out the tile and couldn't completely remove the caulk.
So when I get my new tiles I am going to emulate craigers in-wall with tile on the bottom, then one row on the sides and back with a fake poly foam rock wall above that row all the way around.
So....
1. What grout do i use for my new tile job?
2. Do I need to polyurethane topcoat the tile job when finished grouting?
3. Should I buy new wood or re-use my hodge-podge of cheap plywood from this tank/cage? (if new, what is the cheapest, safest type?)

Thanks guys!
 

Craiger

Bearded Dragon Egg
3 Year Member
1,000+ Post Club
Messages
1,682
I'm at home today, so I can finally add some more decent information. The grout I used is Keracaulk U. I's a Premium Color-Matched Unsanded Acrylic Caulk that also has BioBlock (antimicrobial protection). I sealed it with Tile Guard's One Step Grout Sealer. It's a spray....but be careful when using it. Make sure there's plenty of ventilation. I almost choked myself out when I used this. I think I also used this to seal my background.

Honestly, I think there are so many others out there using plywood made from pine that I haven't really seen too much support against using it due to the out-gassing. I'd most definitely stay away from cedar, but I just haven't been able to find anything rock-solid on the pine. Especially since you'll be covering it all up. Granted, the ceiling in my "in-the-wall" enclosure gets pretty warm, but that's from the lights themselves. If you're concerned about the ceiling, maybe it could be the only piece you replace and keep the rest.

I replied to your PM on Sam's Place (my stand-alone enclosure). However, here's the thread: http://mybeardie.com/bearded-dragon-forum/bearded-dragon-habitats/sam's-place/

If your beardie is a female, I'm not sure I'd adhere and grout the tile like I did. In fact, I KNOW I wouldn't do it over. It's cool for my male, but females tend to do a lot of digging before they lay eggs (fertile or infertile). Sam's never been with a male and has laid LOTS of eggs. I've put a non-adhesive linoleum over the top of the tile in Sam's enclosure in order to keep her from filing her nails down so far that they bleed.
 

TheVirus

Bearded Dragon Egg
3 Year Member
Messages
248
Hey Eagles

If you do rebuild your enclosure you should think long term.

I'd either seal the entire enclosure so the wood doesn't rot from moisture, or I'd line the inside of the cage with tile board or FRP.

Also try not to build an enclosure with vents on or near the top. It can dehydrate reptiles faster and if you decide to get a reptile in the future that isn't as hardy as a beardie, you'll have to redo the whole enclosure.

You can also use galvanized horse troughs or rubbermaid stock tanks. You can simply put a piece of glass over the top or build around and above the trough. The troughs will last a very long time, but if aesthetics are important, it will take some work to make them pretty.
 

EAGLES

Bearded Dragon Egg
3 Year Member
Messages
98
TheVirus said:
Hey Eagles

If you do rebuild your enclosure you should think long term.

I'd either seal the entire enclosure so the wood doesn't rot from moisture, or I'd line the inside of the cage with tile board or FRP.

Also try not to build an enclosure with vents on or near the top. It can dehydrate reptiles faster and if you decide to get a reptile in the future that isn't as hardy as a beardie, you'll have to redo the whole enclosure.

You can also use galvanized horse troughs or rubbermaid stock tanks. You can simply put a piece of glass over the top or build around and above the trough. The troughs will last a very long time, but if aesthetics are important, it will take some work to make them pretty.

I've decided on 3/4" white melamine as my h.d. has sheets for $36....that and the liquid nails is only $40.
 

TheVirus

Bearded Dragon Egg
3 Year Member
Messages
248
I have a Melamine enclosure. I lined the bottom half of the enclosure with tile board. The only downfall of Melamine is its very heavy and expensive. Whats good is you don't have to build a frame.

DSC02059.jpg

DSC02061.jpg
 

EAGLES

Bearded Dragon Egg
3 Year Member
Messages
98
Ended up buying oak, it was cheaper than birch and same price as melamine.
 

EAGLES

Bearded Dragon Egg
3 Year Member
Messages
98
I have started over.
I purchashed a 3/4 x 4 x 8 sheet of oak and new tiles.
Putting the box together today, light fixtures mounted and hopefully getting tiles placed, but they will not get grouted yet.
Next weekend will be the grouting, sealing, staining and glass door on track installment.
 

Craiger

Bearded Dragon Egg
3 Year Member
1,000+ Post Club
Messages
1,682
Cool....good deal!

Weird that the oak ended up being cheaper than the birch. I was able to get cabinet grade birch, 3/4", for $24.99 a sheet. The 3/4" melamine was $27.99 at the time.

Lookin' forward to your progress, dude. Got any pics? :)
 

EAGLES

Bearded Dragon Egg
3 Year Member
Messages
98
Craiger said:
Cool....good deal!

Weird that the oak ended up being cheaper than the birch. I was able to get cabinet grade birch, 3/4", for $24.99 a sheet. The 3/4" melamine was $27.99 at the time.

Lookin' forward to your progress, dude. Got any pics? :)

The birch/maple was $48, the oak was $39, the melamine was $37.
The liquid nails is not working very well because I dont have clamps, so just makeshift weighting. The box minus the rear panel is almost dried. When it is I will liquid nails the rear on and then when that dries I will pre-drill nail holes and nail together.
When should I take pics in the process?
 

Craiger

Bearded Dragon Egg
3 Year Member
1,000+ Post Club
Messages
1,682
EAGLES said:
Craiger said:
Cool....good deal!

Weird that the oak ended up being cheaper than the birch. I was able to get cabinet grade birch, 3/4", for $24.99 a sheet. The 3/4" melamine was $27.99 at the time.

Lookin' forward to your progress, dude. Got any pics? :)

The birch/maple was $48, the oak was $39, the melamine was $37.

Wow! They've gotten a lot more expensive in the last three years.

The liquid nails is not working very well because I dont have clamps, so just makeshift weighting. The box minus the rear panel is almost dried. When it is I will liquid nails the rear on and then when that dries I will pre-drill nail holes and nail together.

I pre-drilled holes and used screws to put mine together. Worked just fine. With the melamine being as smooth as it is, will the liquid nails hold it together long-term?

When should I take pics in the process?

Before, during, and after. Be sure to get your "mug" in at least one of them....and I'm not referring to something you drink coffee out of. ;D
 

EAGLES

Bearded Dragon Egg
3 Year Member
Messages
98
Remember, I used oak, not melamine.
So, after thinking it was cured and ry, i turned the four sided box over to attach the rear panel.....the liquid nails gave way and it became a wood pile.
Ended up drilling and then finish nailing it all, so the liquid nails will just be a little extra.
I laid out a few tiles to see how many I would need cut.
I will order the track and the glass tomorrow.
Next weekend I will pick up the silicone and the grout and the polystyrene foam going....as well as some stain for the outside.

IMG_1143640x480.jpg

IMG_1142640x480.jpg
 

Craiger

Bearded Dragon Egg
3 Year Member
1,000+ Post Club
Messages
1,682
Oh....yeah. Oak. *goes to grab dunce hat only to realize he's still wearing it*

That's going to look good, dude!
 

EAGLES

Bearded Dragon Egg
3 Year Member
Messages
98
Not as nice as your setups, but it should turn out decent and most importantly safe for a long time.I am modeling it after your in-wall. Tile on floor and one row around sides and back.
What did you use for the sides above the one row of tile?
Do you reccomend any particular polyurethane for the sealing of the wood, tiles and polystyrene foam?
 

Craiger

Bearded Dragon Egg
3 Year Member
1,000+ Post Club
Messages
1,682
I didn't use anything above the tiles in my "in-the-wall". As the styrofoam insulation protruded out further than the tiles, I just let the background cover the tops.

I think I mentioned the grout sealer I used earlier in the thread. I used that same sealer on the background. Here's the quote from my earlier thread. Pretty sure it would work just fine on the wood floor, too. Personally, I wouldn't use it on the walls or ceiling as beardies don't require high humidity like those of other reptiles. But that's just me. Somebody else might tell you different.

I sealed it with Tile Guard's One Step Grout Sealer. It's a spray....but be careful when using it. Make sure there's plenty of ventilation. I almost choked myself out when I used this. I think I also used this to seal my background.
 

EAGLES

Bearded Dragon Egg
3 Year Member
Messages
98
Cool, so you used the foam above the tiles all the way around.....I will do the same, while trying to incorporate some climbs and ledges.
 

EAGLES

Bearded Dragon Egg
3 Year Member
Messages
98
Mission Control............We Have A Problem
I did not think far enough ahead and siliconed my floor tiles down when I got home from work. By the time I realized that I had wanted to leave 3/4" for the dual glass door track they were "cemented" down solid. FLUSH to the edge of the floor and side pieces of oak.
So.......I am trying to figure out what to do.
I'm thinking of attaching 1" x 1" pieces of wood, like a frame, all around the front four edges.....mounting the track on the top and bottom pieces and then using the sides as, well, the sides.
Any good, this idea?

Open to any and all suggestions!!!
IMG_1149480x640.jpg

IMG_1146480x640.jpg

IMG_1148480x640.jpg
 

Craiger

Bearded Dragon Egg
3 Year Member
1,000+ Post Club
Messages
1,682
Eh....I think you're perfectly fine, if you ask me. ;D

Honestly, do you have any of your oak plywood left? If so, make a front piece to fit and cut a window out with a 2-3 inch perimeter (leaving more material at the top). This will make sure the "window" is structually sound and give you something to mount the track to. It's very similar to what I did on Sam's enclosure. See? Well....except I used boards instead of plywood. Same effect, though.

PA240284.jpg
 

EAGLES

Bearded Dragon Egg
3 Year Member
Messages
98
Nope, every square inch was used....if it wasn't $40 for another sheet I would get one for a frame/track job.

I get the idea of framing the edges so that the opening is smaller....but where am I actually mounting the tracks? Do I need two pieces on each edge together on a 90degree angle(one out from cage on each edge and then one 'up/down/in' back towards to center of the opening?
 

Latest posts

Top