- Messages
- 1,856
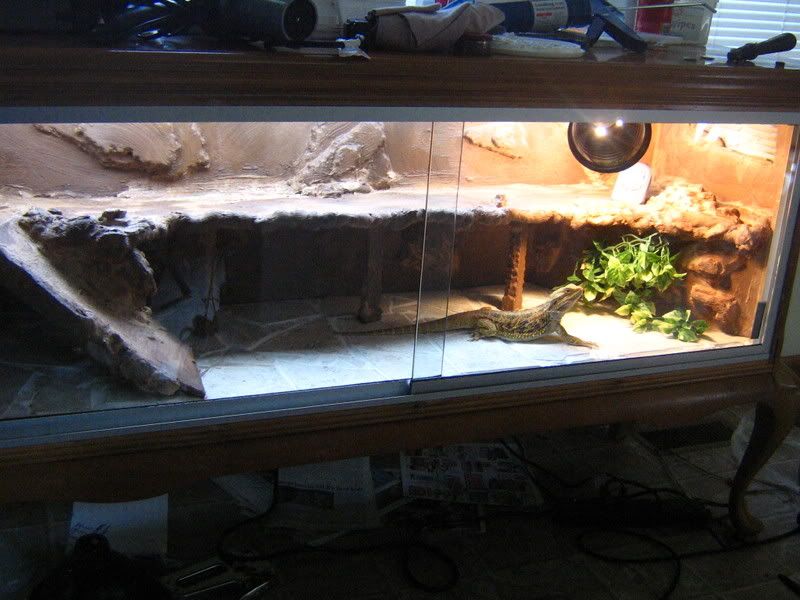
Videos to DIY: http://www.youtube.com/watch?v=0oWFYLS6QS8
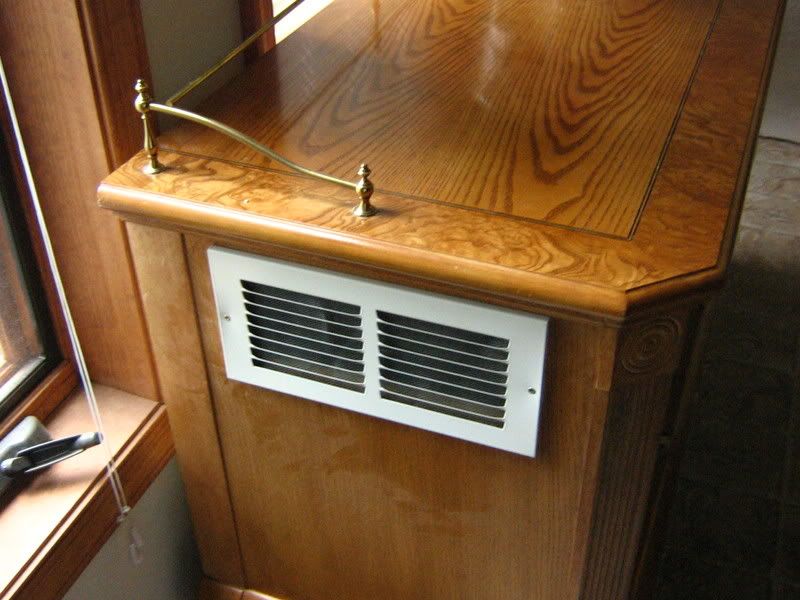
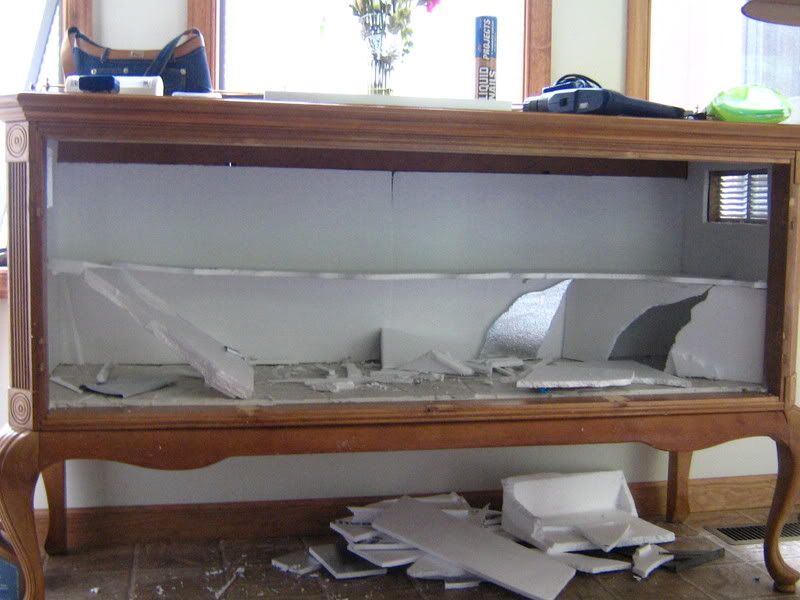
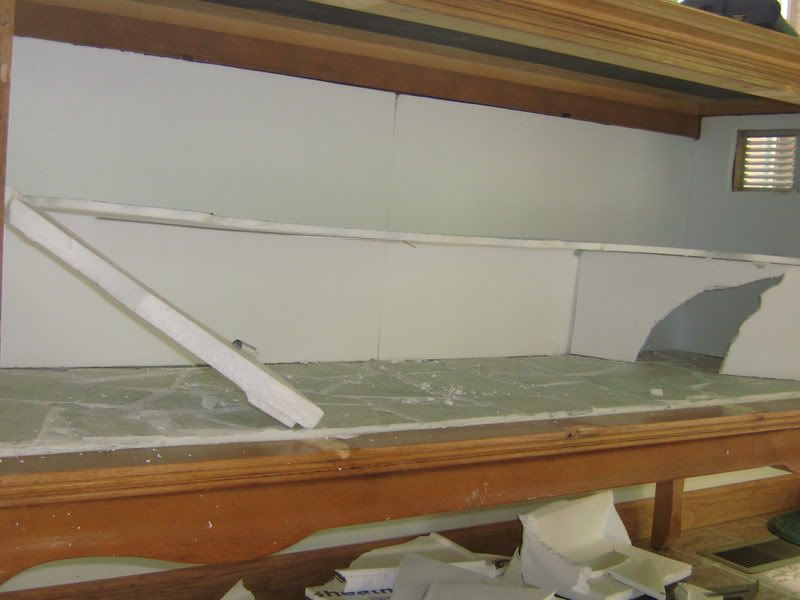
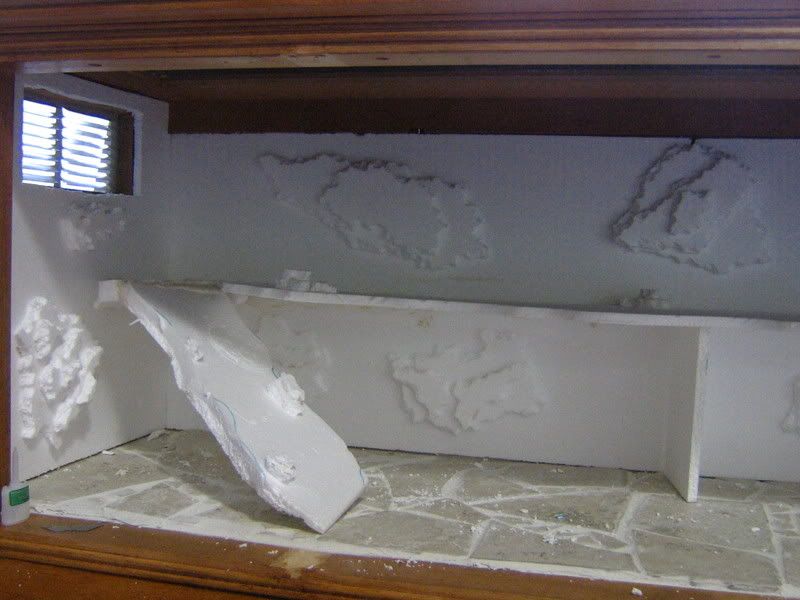
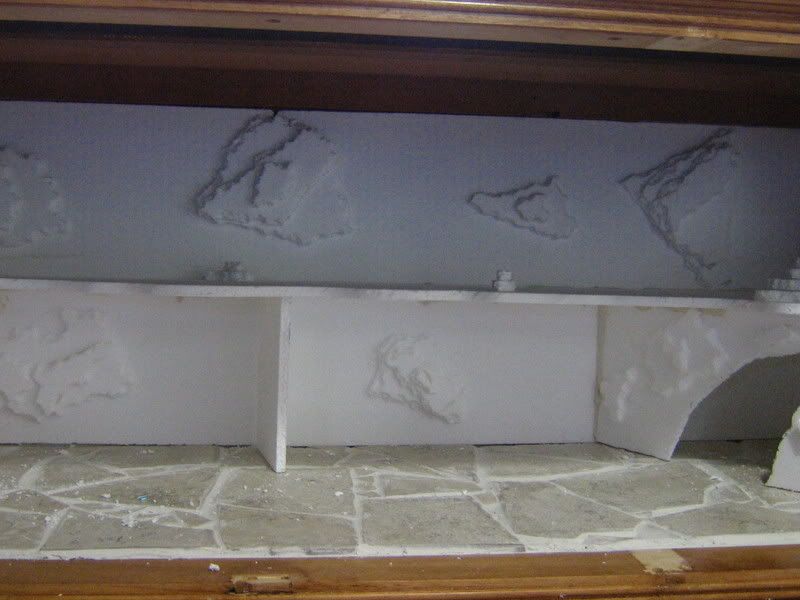
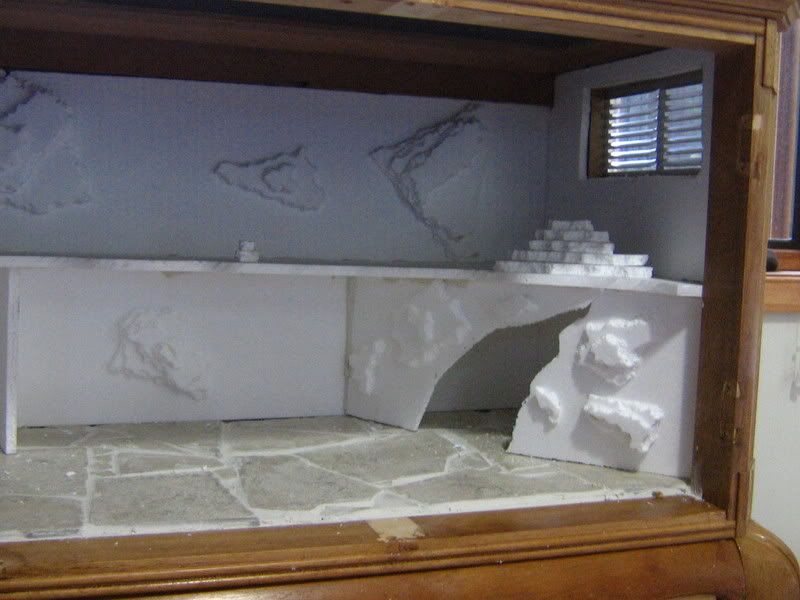
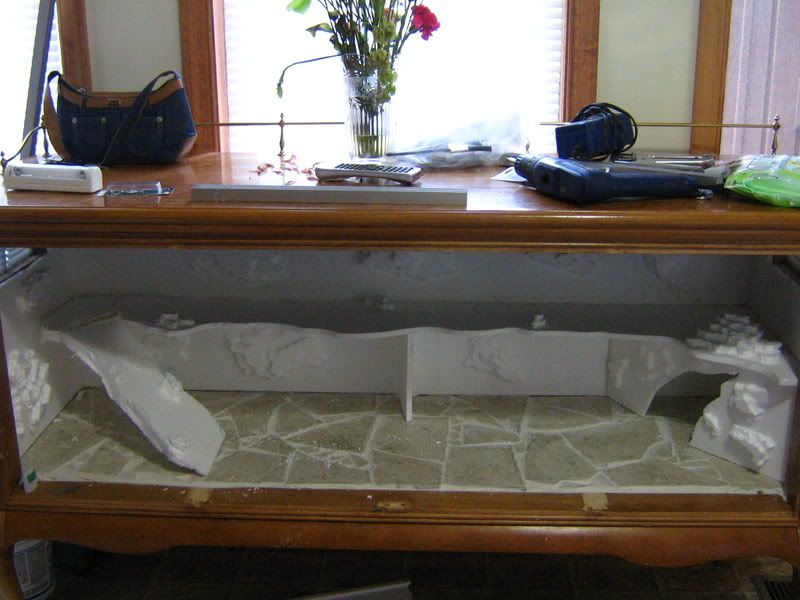
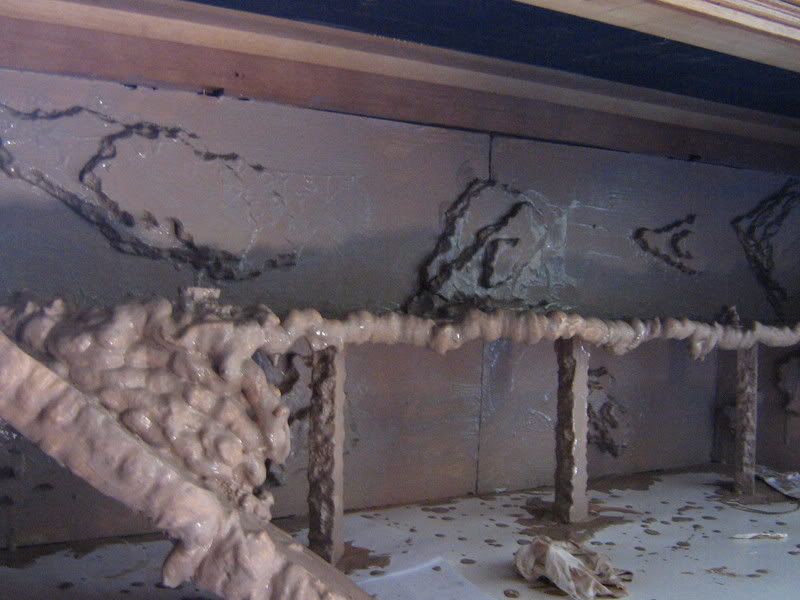
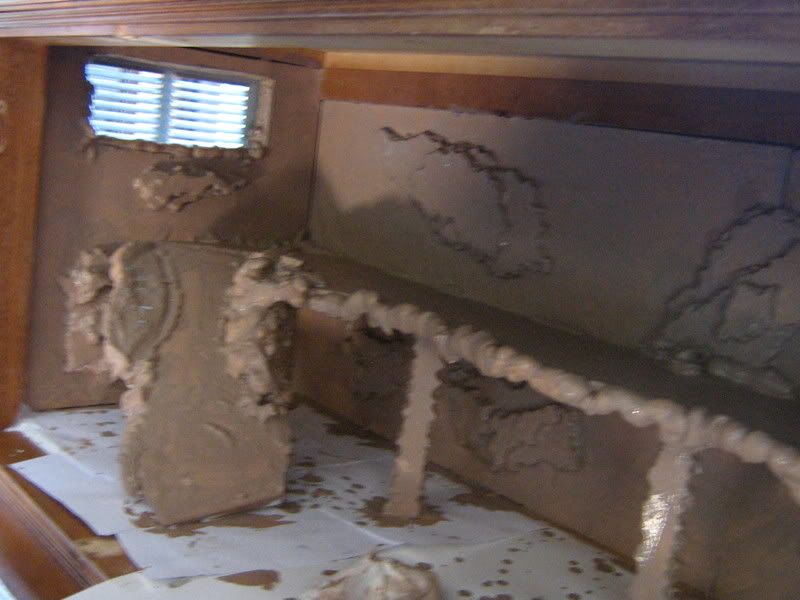
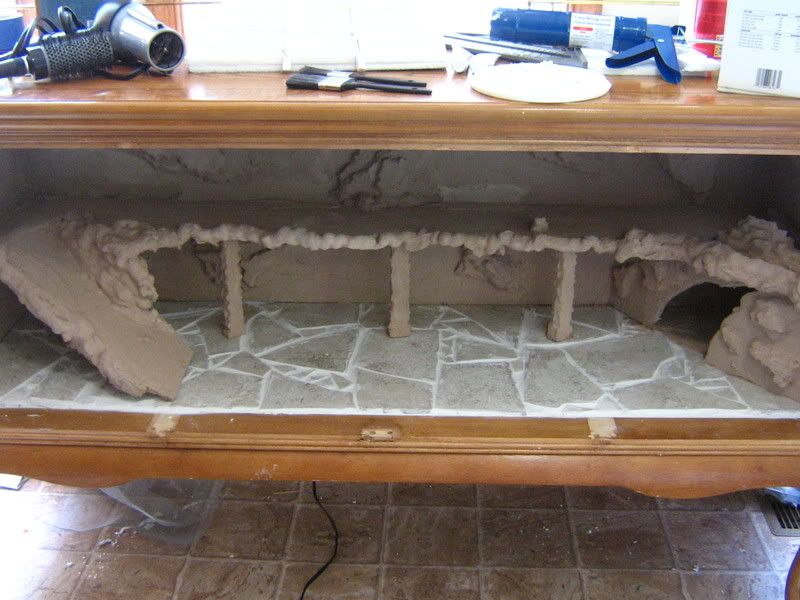
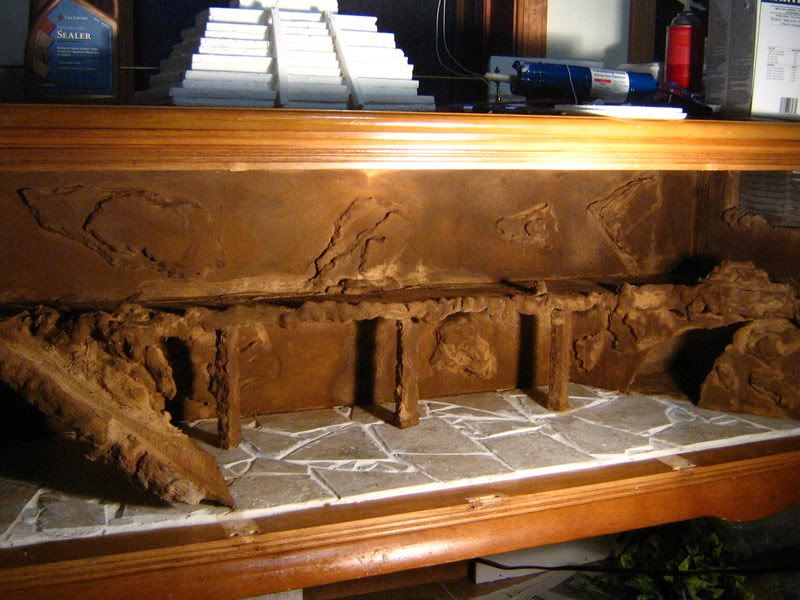
Materials that i used to make this are:
* 1/2 inch thick sheets of styrofoam
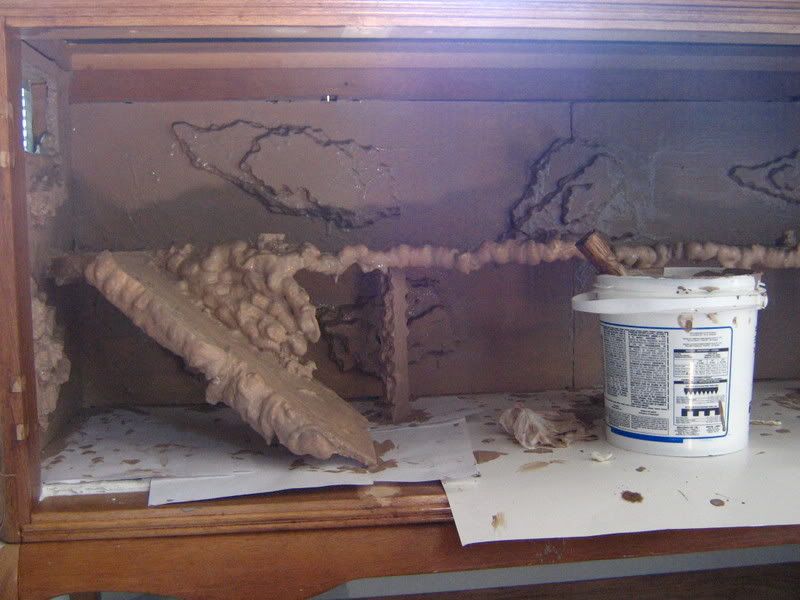
* non sanded tile grout (can be premade or the kind in the bag u gotta mix i used both)
*great stuff for gaps and cracks (foam in a can)
* several paint brushes of diff sizes
* 2 empty spray bottles
* liquid nails and a caulking gun
* acrylic paint (i used burnt umber)
* mod podge 100% nontoxic sealer (can be bought in any craft store)
I did this over the course of a week but it can be brought down to a couple days depending how much work you put into it per day. What you gotta do basically is design how u want it and cut it out and then glue it in place where you want it with the liquid nails. On a side note you can also pull away at the edges to give a more natural look to it instead of all straight edges and/or you can use the great stuff to add more foam in weaker spots to add support or a wild abstract edge or rock formation. Once your done gluing things down you need to let it dry overnight and on the second day you can start grouting. The 1st layer should be extremely watery and with each layer (I used 5 layers) it should get thicker and thicker until the last layer is almost clay like but still being able to brush the grout on with the paintbrush. You can go about painting it 2 ways, you can tint the grout with the acrylic paint or you can just buy the grout in a color you want or you can just paint it after the grout dries over night, which i did. In order to paint the grout I took a empty spray bottle and added paint and some water and sprayed everything down and applied 6 coats letting it dry in 20 min intervals. I also took some black acrylic paint and did a very faint dry sponge technique to put some darker accents on the "rock". I let that dry overnight as well and the last day I sealed everything with mod podge. I put that in a spray bottle and added water and applied the sealant. I added 6 coats and let it dry every 20 min before I added another coat I let that cure for 48 hours before I put my dragon in and there ya go!


Materials that i used to make this are:
* 1/2 inch thick sheets of styrofoam
* non sanded tile grout (can be premade or the kind in the bag u gotta mix i used both)
*great stuff for gaps and cracks (foam in a can)
* several paint brushes of diff sizes
* 2 empty spray bottles
* liquid nails and a caulking gun
* acrylic paint (i used burnt umber)
* mod podge 100% nontoxic sealer (can be bought in any craft store)
I did this over the course of a week but it can be brought down to a couple days depending how much work you put into it per day. What you gotta do basically is design how u want it and cut it out and then glue it in place where you want it with the liquid nails. On a side note you can also pull away at the edges to give a more natural look to it instead of all straight edges and/or you can use the great stuff to add more foam in weaker spots to add support or a wild abstract edge or rock formation. Once your done gluing things down you need to let it dry overnight and on the second day you can start grouting. The 1st layer should be extremely watery and with each layer (I used 5 layers) it should get thicker and thicker until the last layer is almost clay like but still being able to brush the grout on with the paintbrush. You can go about painting it 2 ways, you can tint the grout with the acrylic paint or you can just buy the grout in a color you want or you can just paint it after the grout dries over night, which i did. In order to paint the grout I took a empty spray bottle and added paint and some water and sprayed everything down and applied 6 coats letting it dry in 20 min intervals. I also took some black acrylic paint and did a very faint dry sponge technique to put some darker accents on the "rock". I let that dry overnight as well and the last day I sealed everything with mod podge. I put that in a spray bottle and added water and applied the sealant. I added 6 coats and let it dry every 20 min before I added another coat I let that cure for 48 hours before I put my dragon in and there ya go!
")
")