Ive had a few people ask about my substrate choice, and thought I would go over it on its own thread so as to not hijack others. Its a little long, so I had to break it up into a few posts.
I, and a growing number of other keepers, have made the switch to a more natural substrate choice, namely bioactive soil. I would like to premise this by saying that this is not the best choice for everyone. It does require some maintenance, and a certain commitment. It is not overly difficult or indeed really any harder to maintain than other substrates, but it does take some setting up and continued attention. If you neglect your tile floor, you just get a gross dirty floor, but if you neglect your soil, you can have other issues. I give this qualification because I have helped some to set this up, only to come back a few months later to see a bone dry, dead dusty substrate and keepers shrugging their shoulders like somehow it was the fault of the soil that their dragon is now having issues. Soil is a great choice, but you must pay attention to it like you pay attention to your animal. You are creating a living thing, a tiny microhabitat with its own inhabitants, its own nitrogen cycle, its own breath, in essence. If you take care of it, it will flourish and take care of your dragon. If you dont, it will die and be a rotting thing that can cause problems.
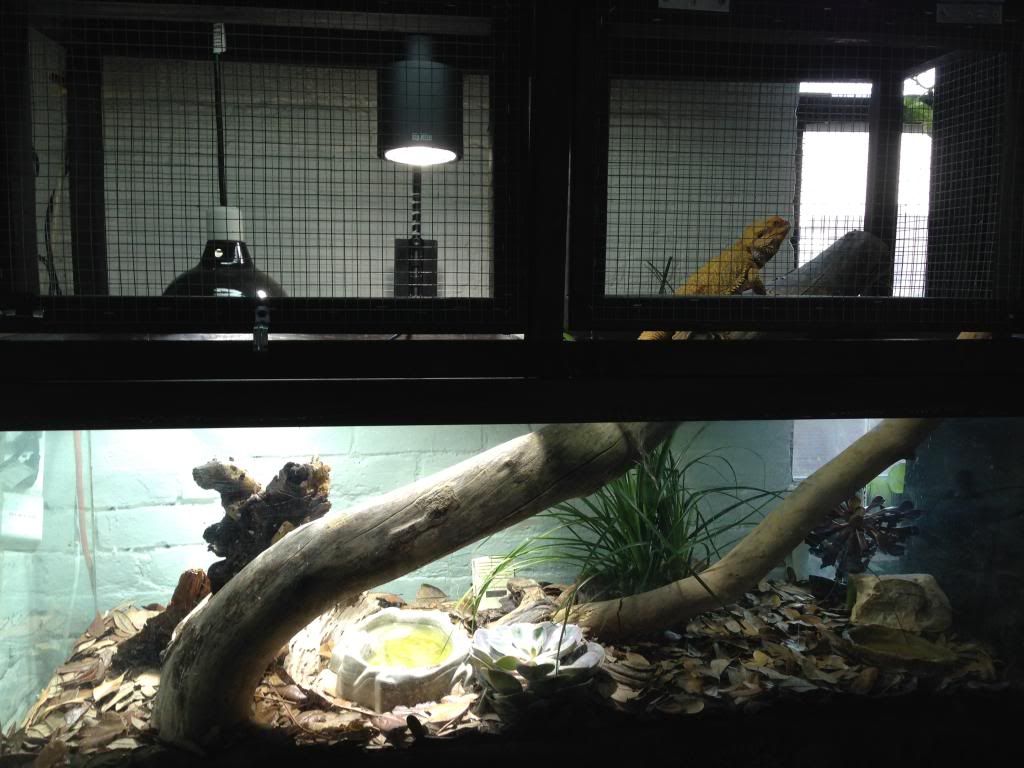
Ok now that the warning is over, lets get to the fun stuff. Like all wild things, dragons are part of a complex ecosystem, and are adapted to such. Its no mistake that they taste everything, and their bodies are adapted to the results of that. I believe they are not meant to be in a sterile environment, and that doing so creates its own problems. So instead, I started using a bioactive soil within the enclosure to create a mini ecosystem. It allows for more natural behaviours, looks and smells great, and if maintained, will be self cleaning for the most part. Ive had a few people ask how to set it up, so the following is a basic outline of how to begin.
First, make sure you have a waterproof enclosure. It doesnt have to be glass or plastic, but that is the easiest way of course. If you have a wood enclosure, you can seal it with an epoxy resin or multiple layers of a good polyurethane. Just remember that this will be heavy, so if its wood, it will need to be sturdy and sealed. For first timers doing this, I always recommend an aquarium or glass/plastic enclosure so that you can see how much you are watering.
To start with, you will need to create a drainage layer. This is so that when you water the soil, the bottom does not become waterlogged. With a drainage layer in the bottom, the excess water will flow through and then drain out of the soil and into whatever you use for your drainage layer, keeping the soil moist but not wet. There are many ways to create a drainage layer, but probably the easiest and cheapest is with what are called expanded clay pellets/balls, also known as hydroton balls. You can find them at any garden center, hardware store, etc. They usually come in big bags for about $10. Here is an example:
http://www.growitbest.com/-p-1049.html
How much you need will of course depend on your enclosure size. You want to have a layer about an inch thick over the bottom of the entire enclosure. Some people also use that plastic grating that you see in fluorescent light fixtures in offices, often called plastic egg crate. Personally I think its a little harder to work with, and more expensive, but its up to you. Here is an example:
http://www.homedepot.com/p/Unbrande...e-Lighting-Panel-5-Pack-LP2448EGG-5/202653781
If you are needing to be even more frugal, then you can use just good ole gravel too. Get the bigger size, around 3/4"-1" size gravel, that has been washed already. Youll probably need to wash it again when you get it so that there is no fine material in the bottom of the enclosure, but otherwise it will do just fine. Again, all you are doing is providing a place for the water to drain out to. Again, this can be found at any hardware or garden centre. I think the last 25 pound bag I bought was around $4.
I, and a growing number of other keepers, have made the switch to a more natural substrate choice, namely bioactive soil. I would like to premise this by saying that this is not the best choice for everyone. It does require some maintenance, and a certain commitment. It is not overly difficult or indeed really any harder to maintain than other substrates, but it does take some setting up and continued attention. If you neglect your tile floor, you just get a gross dirty floor, but if you neglect your soil, you can have other issues. I give this qualification because I have helped some to set this up, only to come back a few months later to see a bone dry, dead dusty substrate and keepers shrugging their shoulders like somehow it was the fault of the soil that their dragon is now having issues. Soil is a great choice, but you must pay attention to it like you pay attention to your animal. You are creating a living thing, a tiny microhabitat with its own inhabitants, its own nitrogen cycle, its own breath, in essence. If you take care of it, it will flourish and take care of your dragon. If you dont, it will die and be a rotting thing that can cause problems.
Ok now that the warning is over, lets get to the fun stuff. Like all wild things, dragons are part of a complex ecosystem, and are adapted to such. Its no mistake that they taste everything, and their bodies are adapted to the results of that. I believe they are not meant to be in a sterile environment, and that doing so creates its own problems. So instead, I started using a bioactive soil within the enclosure to create a mini ecosystem. It allows for more natural behaviours, looks and smells great, and if maintained, will be self cleaning for the most part. Ive had a few people ask how to set it up, so the following is a basic outline of how to begin.
First, make sure you have a waterproof enclosure. It doesnt have to be glass or plastic, but that is the easiest way of course. If you have a wood enclosure, you can seal it with an epoxy resin or multiple layers of a good polyurethane. Just remember that this will be heavy, so if its wood, it will need to be sturdy and sealed. For first timers doing this, I always recommend an aquarium or glass/plastic enclosure so that you can see how much you are watering.
To start with, you will need to create a drainage layer. This is so that when you water the soil, the bottom does not become waterlogged. With a drainage layer in the bottom, the excess water will flow through and then drain out of the soil and into whatever you use for your drainage layer, keeping the soil moist but not wet. There are many ways to create a drainage layer, but probably the easiest and cheapest is with what are called expanded clay pellets/balls, also known as hydroton balls. You can find them at any garden center, hardware store, etc. They usually come in big bags for about $10. Here is an example:
http://www.growitbest.com/-p-1049.html
How much you need will of course depend on your enclosure size. You want to have a layer about an inch thick over the bottom of the entire enclosure. Some people also use that plastic grating that you see in fluorescent light fixtures in offices, often called plastic egg crate. Personally I think its a little harder to work with, and more expensive, but its up to you. Here is an example:
http://www.homedepot.com/p/Unbrande...e-Lighting-Panel-5-Pack-LP2448EGG-5/202653781
If you are needing to be even more frugal, then you can use just good ole gravel too. Get the bigger size, around 3/4"-1" size gravel, that has been washed already. Youll probably need to wash it again when you get it so that there is no fine material in the bottom of the enclosure, but otherwise it will do just fine. Again, all you are doing is providing a place for the water to drain out to. Again, this can be found at any hardware or garden centre. I think the last 25 pound bag I bought was around $4.
")