- Messages
- 84
- Location
- Manchester, Ct
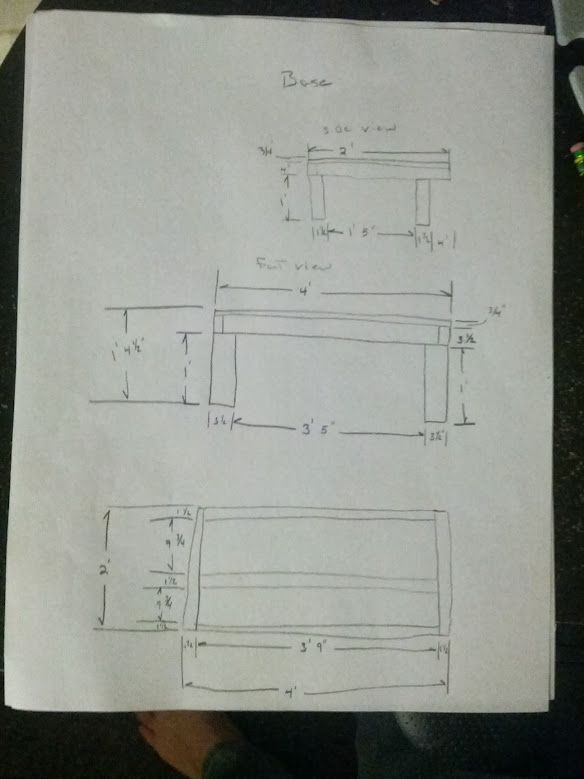
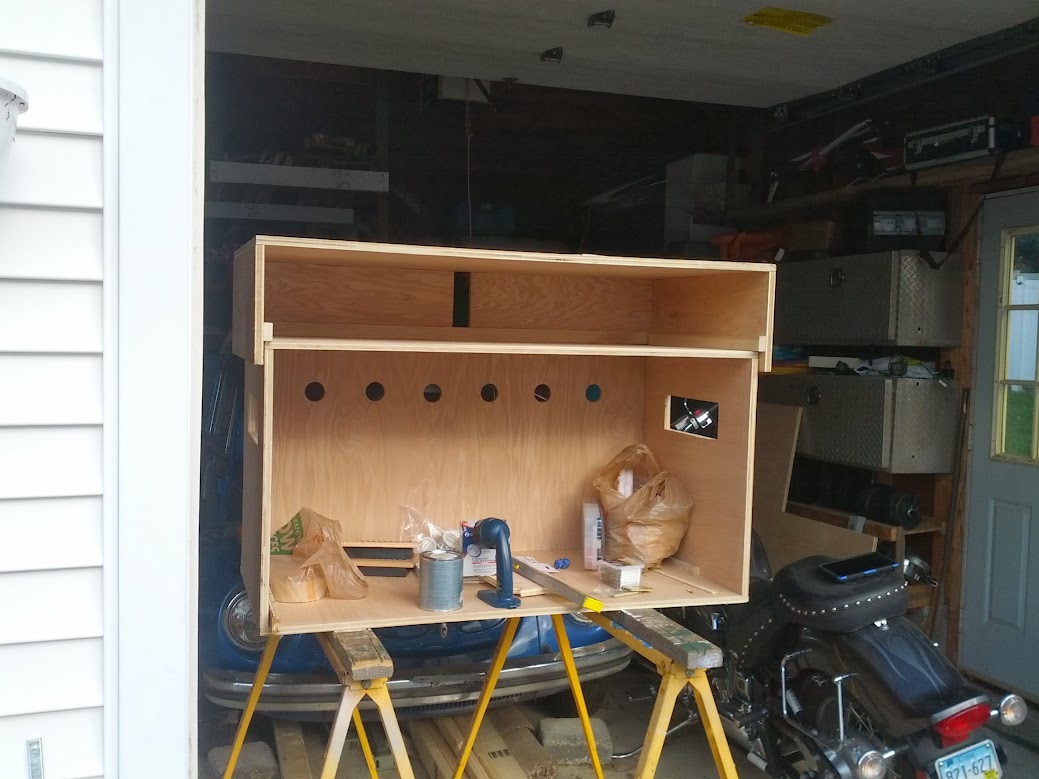
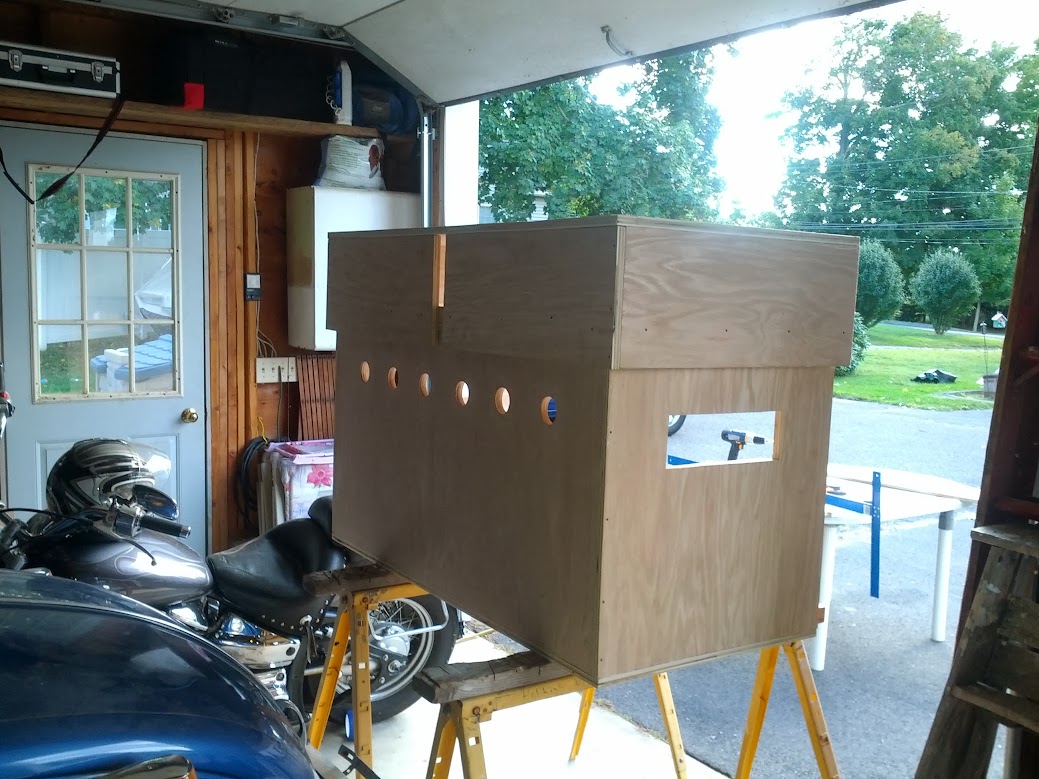
So I've been playing with ideas for a new viv for our 12" beardie. I decided to go with a basic crossfire build for the viv itself with a custom hood and stand. I chose to use 3/4 sanded oak plywood for the viv and the outside of the stand and the hood. the frame of the stand is gonna be cheap 2x4's . The stand is sized to house my dubia roach colony bin and my feeder roach bin along with necessary heat tape and thermostat controls. The hood cage and stand are all separate pieces for easier moving and transport if/when we move. The front of the cage will have sliding glass doors but will also slide into place and lock so that it can be removed for easier cleaning of the inside (not shown in any drawings or models). I started off drawing it up on paper
Vivarium
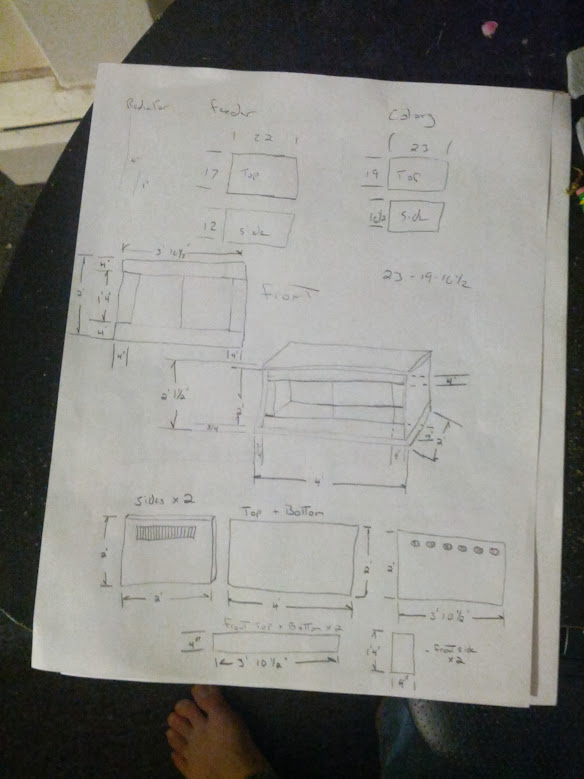
Hood
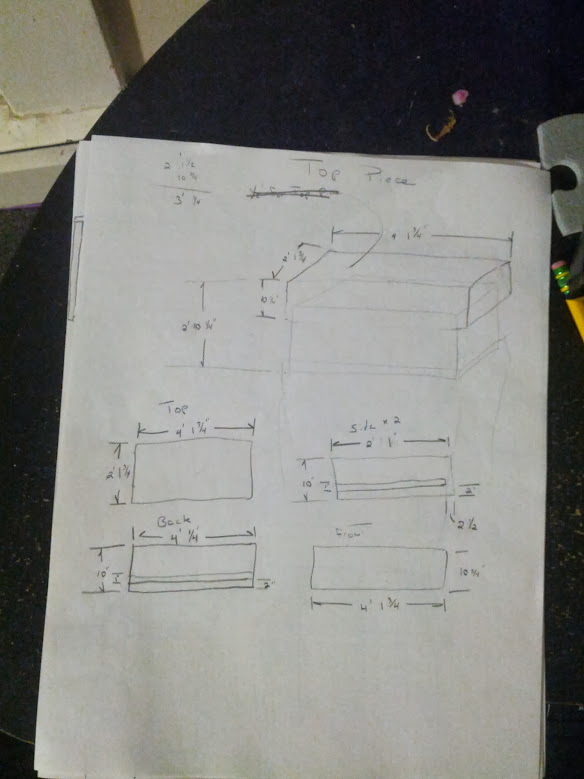
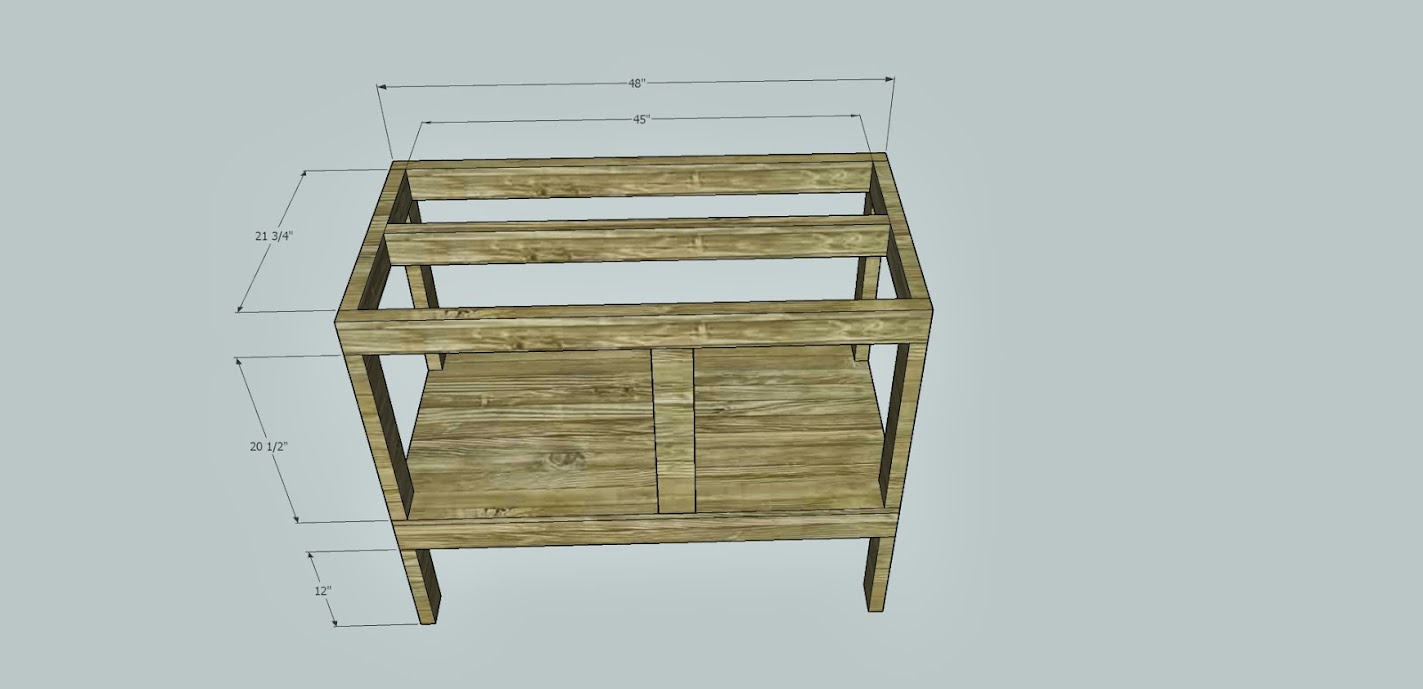
stand
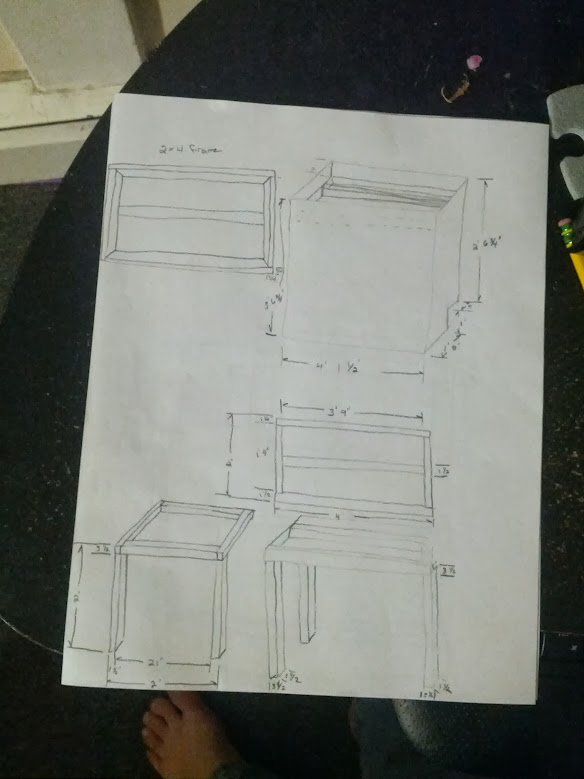
base
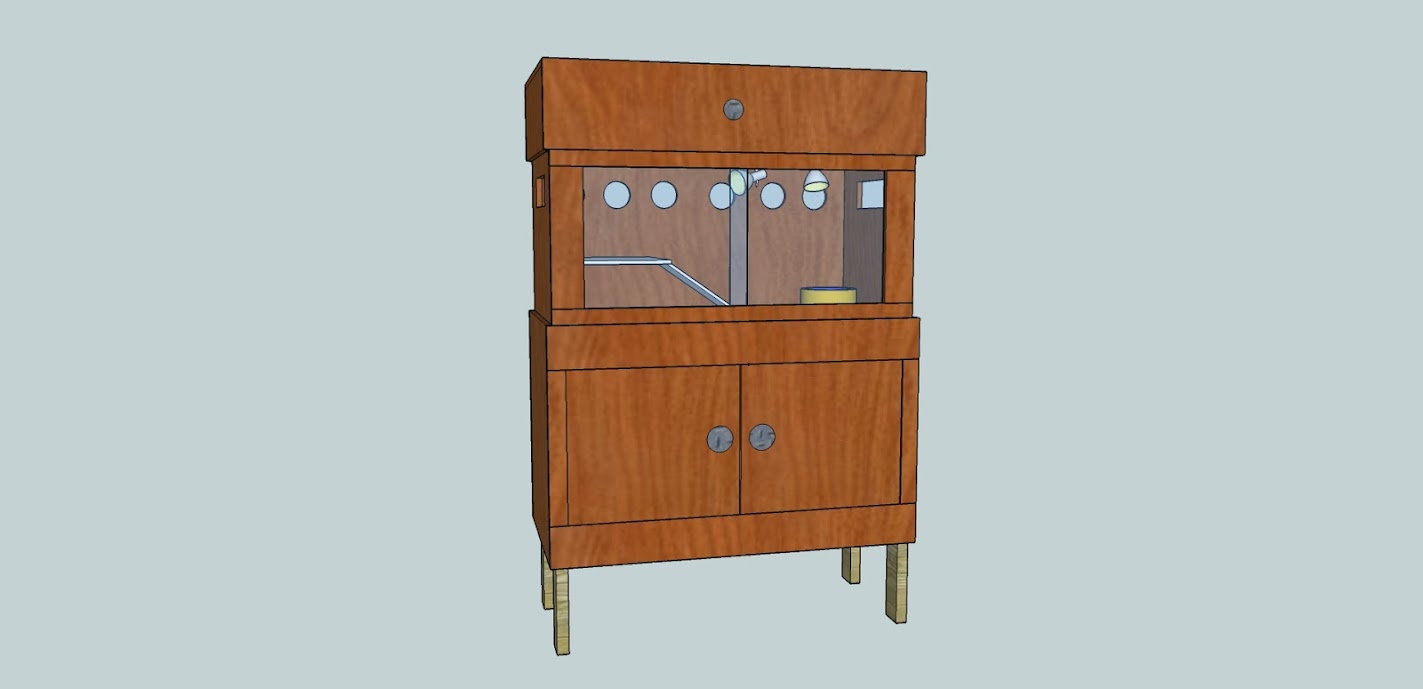
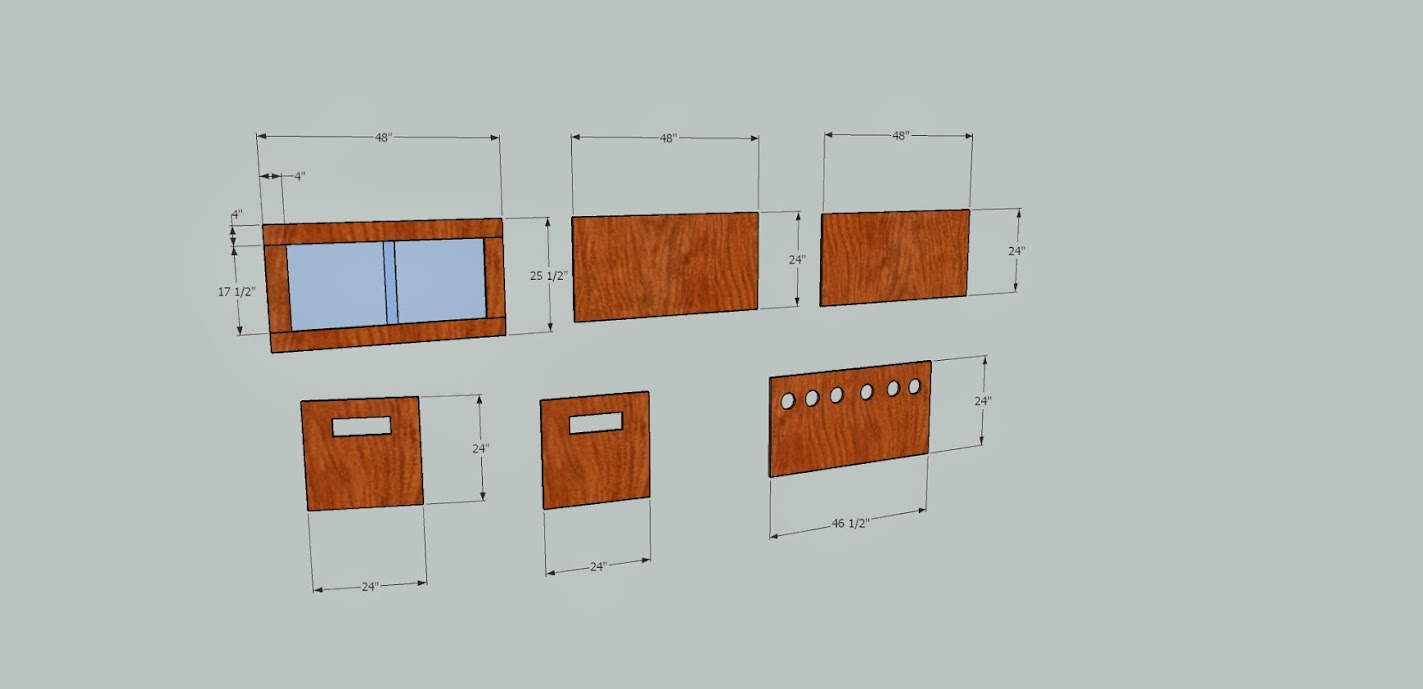
Then since i didn't have the money yet I learned a little about using http://www.sketchup.com/ and created a 3D model. I was able to fine tune my measurements and fix a few math errors and add a few new ideas here. This part though a little frustrating was very very fun. I am a bit of a geek. If anyone has sketchup and would like to look at it here is a link to it https://www.dropbox.com/sh/8hsiawm4qf4d60l/_GKn3MrrlO
Or if you have a cad program there is a .dxf file. it is not as good since the export from sketchup isn't quite 100% but if you look at it as a wire frame its better. I used this to load a copy onto my Nexus 7 tablet and show it off at work.
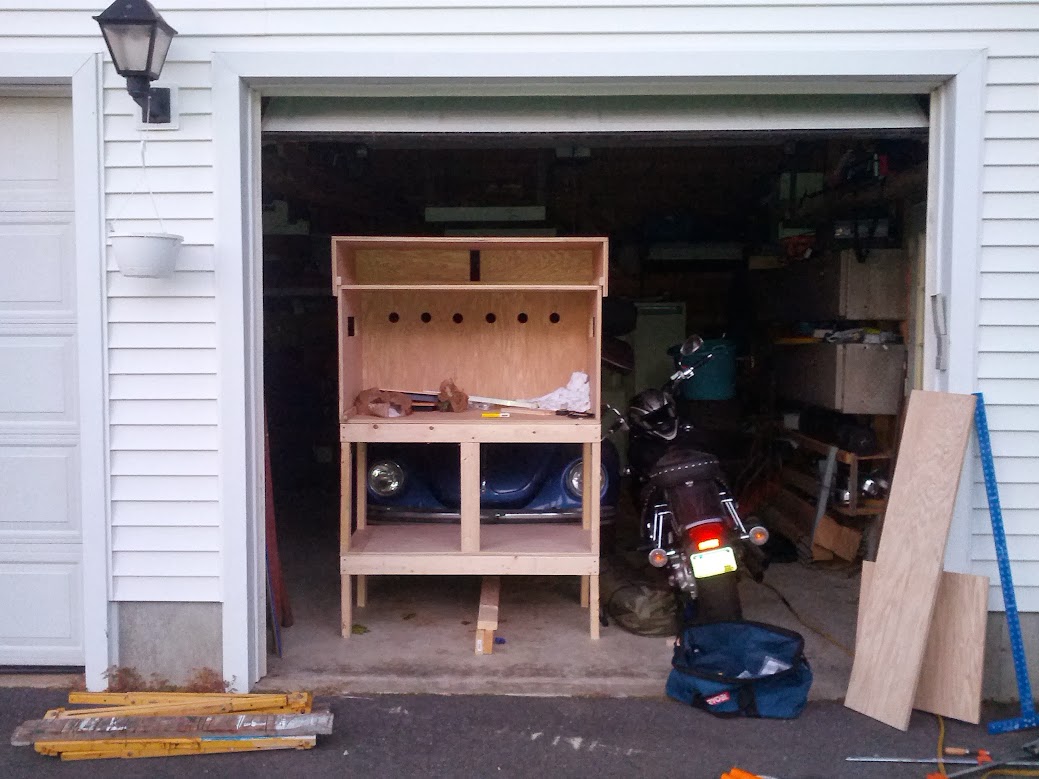
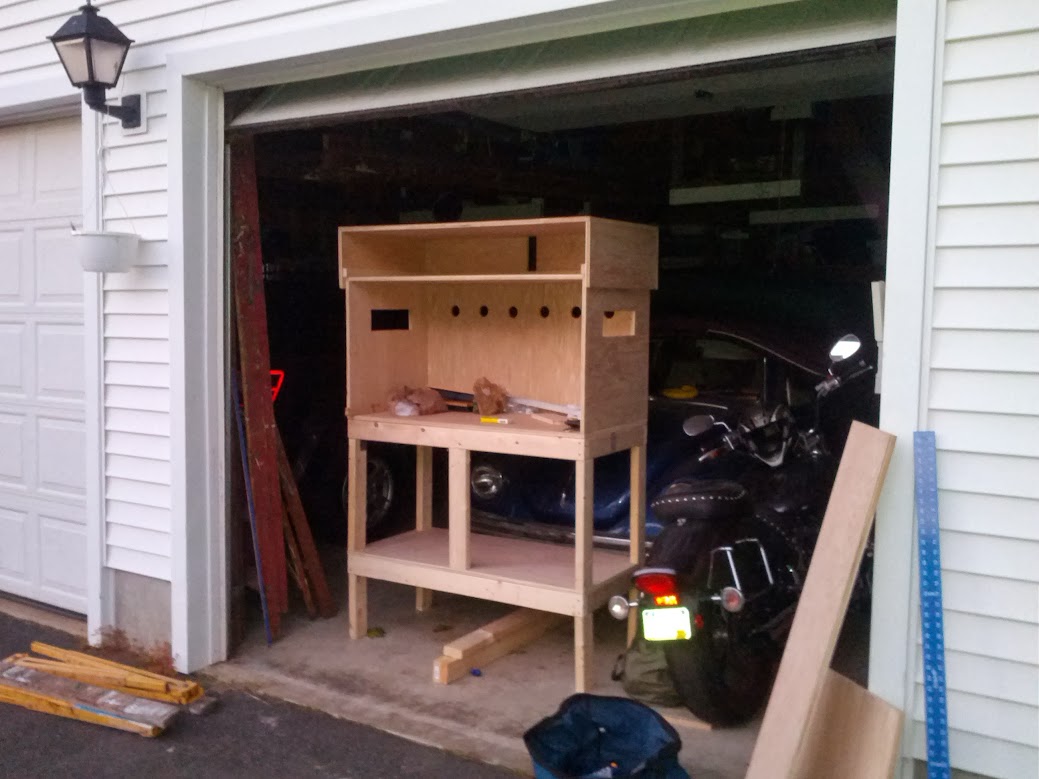
I finally was able to start it today. Here are some more pics
pile of wood
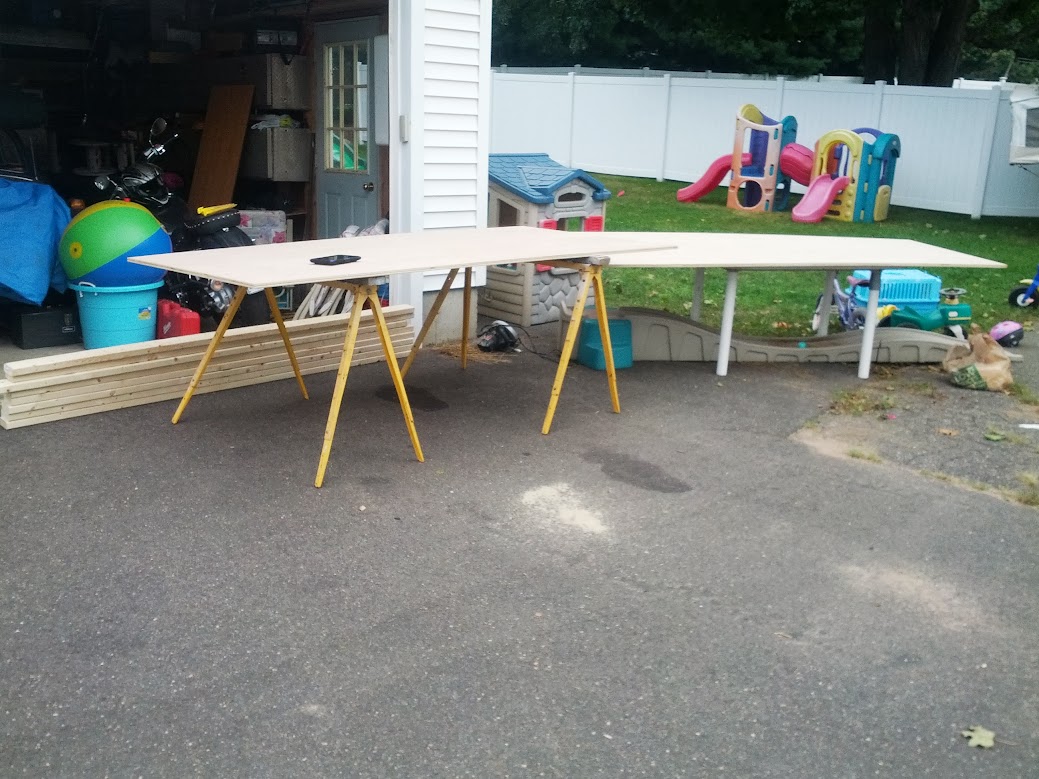
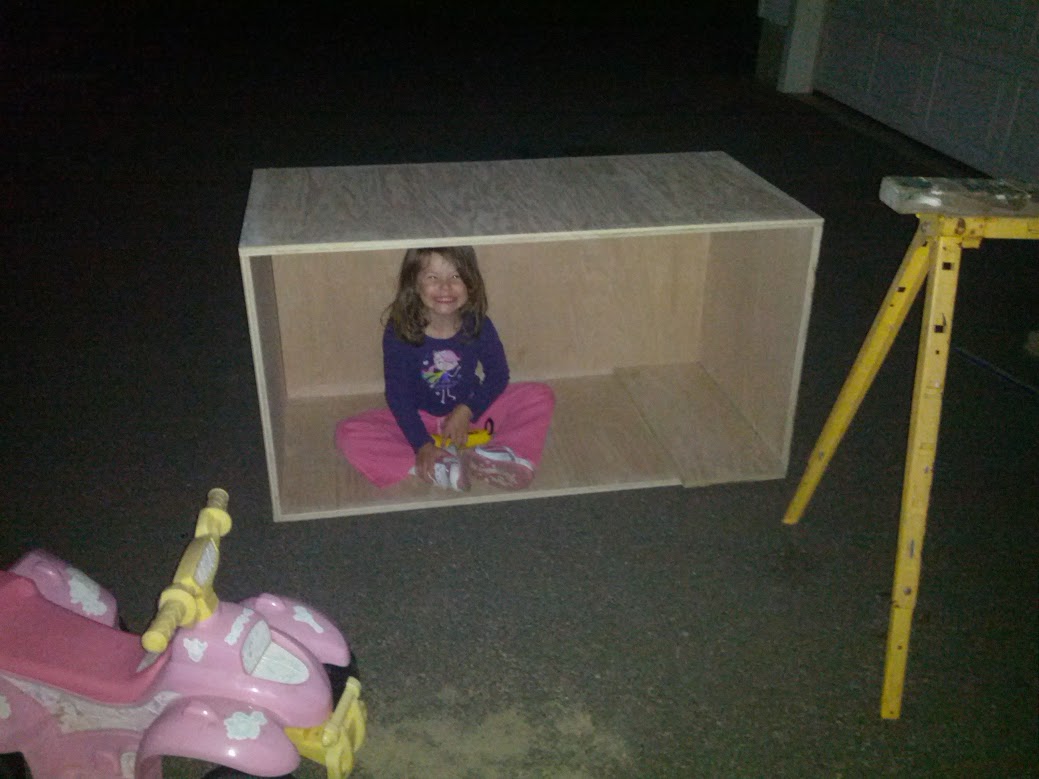
my little helper showing off the size of a crossfire build.
So far i am $200 into wood and supplies. That includes
8 - 2x4x8
2 - 4x8x3/4 sanded oak plywood
box of screws
stain and some supplies
tube of liquid nails (not sure if I'm actually gonna use it or not)
Misc brackets and fasteners for the 2x4 frame
I have also spent about $50 on some lights and fixtures. Using an 18" uvb directly above the basking spot with 1 flood light with a spot light on the basking spot (both on a timer) and 1 flood light with a ceramic element over the cool side to help maintain temperature connected to a thermostat. Plugs, timer, thermostat and thermometers will be on top of cage hidden by the hood. I tried to plan this to be a piece of furniture as well as a home for Ord since it will be in our home for many years.
Vivarium
Hood
stand
base
Then since i didn't have the money yet I learned a little about using http://www.sketchup.com/ and created a 3D model. I was able to fine tune my measurements and fix a few math errors and add a few new ideas here. This part though a little frustrating was very very fun. I am a bit of a geek. If anyone has sketchup and would like to look at it here is a link to it https://www.dropbox.com/sh/8hsiawm4qf4d60l/_GKn3MrrlO
Or if you have a cad program there is a .dxf file. it is not as good since the export from sketchup isn't quite 100% but if you look at it as a wire frame its better. I used this to load a copy onto my Nexus 7 tablet and show it off at work.
I finally was able to start it today. Here are some more pics
pile of wood
my little helper showing off the size of a crossfire build.
So far i am $200 into wood and supplies. That includes
8 - 2x4x8
2 - 4x8x3/4 sanded oak plywood
box of screws
stain and some supplies
tube of liquid nails (not sure if I'm actually gonna use it or not)
Misc brackets and fasteners for the 2x4 frame
I have also spent about $50 on some lights and fixtures. Using an 18" uvb directly above the basking spot with 1 flood light with a spot light on the basking spot (both on a timer) and 1 flood light with a ceramic element over the cool side to help maintain temperature connected to a thermostat. Plugs, timer, thermostat and thermometers will be on top of cage hidden by the hood. I tried to plan this to be a piece of furniture as well as a home for Ord since it will be in our home for many years.
Last edited:


 , and the wires were seperate for each bulb. Also both fixtures are adjustable so I can angle it to the spot I want it to hit.
") .
.